Secrets Of Audio Side-Chain Use
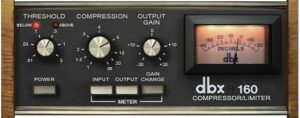
Here’s information all about audio side-chains & key-inputs on compression, gating, & dynamics processors. Learn how and why to use them.
Have you ever looked sideways in wonderment at the “side-chain input” or “key in” jacks on your compressor/limiters, noise gates, or software plug-ins?
What’s an audio side-chain anyway?
Any dynamics device/plug-in such as a compressor, limiter, or gate is basically acting on your input signal to accomplish how it affects your audio. Your input signal instructs the device’s voltage controlled amplifier (VCA in analog terms) or digitally controlled amplifier (DCA for plug-ins) to alter the incoming audio in some manner. Depending on your threshold settings, the input is telling your dynamics device to change the dynamic range (compression & limiting) or even turn audio on or off (gating.)
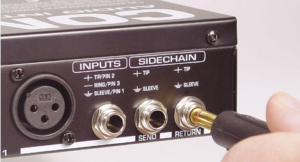
But what if you could instruct your dynamics device or plug-in to act on something other than the input signal itself? That’s where side-chains and key inputs come in. And, these side-chain inputs will help you achieve some useful audio processing tricks. Such as De-essing, Ducking, Keyed Gating, and more. Let’s examine these options one at a time:
Secrets Of Audio Side-Chain Use
Side-Chain De-Essing:
DE-ESSING: De-essing can be defined as frequency selective compression or limiting. To control sibilance on vocals and other overly strident sounding sources the compressor can be instructed to act on those particular frequencies. These are typically frequencies between 2Khz to 8Khz.
In my old House Music days, this was a crucial step in making great sounding vinyl records. Excess and unnecessary high frequency information can result in crappy sounding, low level vinyl cuts. And taming unnaturally shrill high end is still important today.
To De-ess, follow these steps: First patch the compressor on the offending source as usual. Next, parallel the same non-compressed signal to another channel of EQ. We’ll call this the “side-chain EQ.”
You won’t want to use an insert point or a feedback loop will occur. Pickup this extra feed from a separate buss output, mult point, or even a y-cord instead. Your exact configuration will depend if you are using a plug-in, or if you have analog gear.
Next, with either plug-in or analog, route the side-chain EQ output to the “side-chain” or “key” input on the compressor. If your compressor or plug-in features a “side-chain monitor” button, punch it in. If it doesn’t, find a way to monitor the audio from the side-chain EQ. (soloing, etc.)
Now, boost those nasty frequencies between approximately 2Khz and 8Khz on the side-chain EQ. That’s right, make it sound really shrill and hopelessly bright. Sometimes I use the high-pass filter on my Neotek modules to filter everything below 500hz. Adjust the ratio and threshold on the compressor to taste, (Maybe 4:1 with 3-6 db compression.)
The compressor will now be acting on just these 2khz-8khz frequencies. Your side-chain EQ ends up being a sort of inverse equalizer. The more you boost the highs on the side-chain EQ, the smoother the source ends up sounding. This is a result of the compressor acting on your side-chain EQ rather than the original input signal.
You may even choose to roll out the mud, (300hz) on the original input channel EQ. You can also add sparkle (10k and up) to this original source. Using custom side-chain De-essing is the secret to getting a bright vocal sound without tearing listeners ears off with uncontrolled and piercing high end.
Side-Chain Ducking:
DUCKING: Ducking can be defined as one signal, or set of signals controlling the limiting/compression of another signal, or set of signals. For example, suppose you are doing a mixdown in which the producer specifies that the almighty kick drum should take precedence over all other tracks. With ducking, this is easily accomplished.
To setup Ducking follow these steps: First, de-assign all tracks and signals except the kick you wish to duck from your stereo mix. Now send these signals instead via any post-pan stereo aux send or buss to your stereo compressor/limiter’s inputs. Then, return that stereo compressor/limiter outputs to two open faders that are routed to your stereo mix.
Next, send the kick drum signal via a patch point, aux send or buss to the stereo compressor/limiter’s side-chain inputs. You should also select the stereo interconnect feature on your compressor/limiter so the first channel controls both sides of your device. Now, the only channels in the stereo mix are the kick drum itself, and the output of the stereo compressor/limiter. As the kick hits, the whole mix “ducks” to accommodate it depending on your limiter ‘s attack, release, ratio, and threshold settings. You may choose to leave certain elements of the mix un-ducked, such as the vocals.
This ducking technique also works great with voice-overs that have music intros and endings. Route the music bed to the stereo compressor/limiter. Then, send the voiceover track to the side-chain input. When no voice-over is present, the music bed will play unaffected. When the voice-over kicks in, the music bed then ducks nicely around it. Experiment!
Secrets Of Audio Side-Chain Use
Side-Chain Keyed Gating:
KEYED GATE CONTROL: Another easy side-chain remix trick is to tightly gate (short release times) strings or keyboard pads. And then control that gate with a track that has staccato rhythmic interest (like a hi-hat) via the gate’s side-chain input. Then pile on the timed (60000 divided by tempo in BPM = milliseconds) ping pong delays and Presto! Instant House Music!
Side-Chain Drum Trigger Gating For Toms
USING DRUM TRIGGERS: This also is a more advanced side-chain technique for predictably gating toms on a drum set. It involves placing commonly available piezo trigger pads on the shells of each tom.
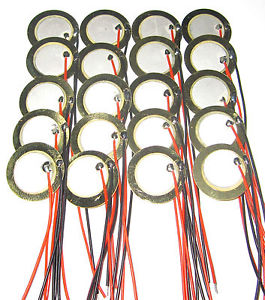
These low cost contact triggers sound pretty nasty audio-wise in my opinion. However, the quick transient spikes they produce with tom hits are the perfect signals to route to your gates’ side-chain inputs.
As you may know, sound travels rather slowly at 1130 feet per second. So even if your tom mic is an inch or two away from the drum head, it still takes a few milliseconds for the sound of the struck tom to actually reach your mic.
But with a contact piezos mounted right on the drum shell, the audio passes from these contact mics the moment the drum is struck. And by routing the triggers’ outputs to your gates’ side-chain inputs, the gate opens slightly before the sound gets to the actual tom mic. That’s because the shell mounted triggers are “faster” than the tom mics such as a typical Sennheiser 421 mounted on a free-standing mic stand.
These inexpensive piezo triggers are typically unbalanced. So you end up grabbing their unbalanced signals and routing them down additional mic lines to your gates’ side-chain inputs. And remember the quality of their audio is unimportant, they only serve as triggers. You’ll set the attack, decay, sustain, release (ADSR) on your gate’s controls. Also, I find that gating no more than 20 db of signal reduction sounds the smoothest for drums. Setting the gates for full gain reduction yields unnatural results from cymbal leakage.
Is It Worth The Extra Work?
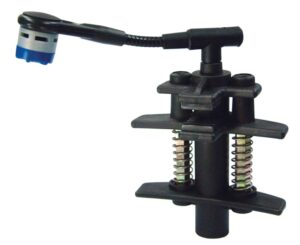
Although this triggering procedure adds setup time, it’s a great solution for kits with many tom mics. This side-chain technique will allow greater control over open ringing tom mic issues. I have also found that clamp-on tom mics such as Shure Beta 98s, Beyer Opus 88s, and EV 408s are faster than a tom mic on a separate mic stand. These mics may not require the side-chain triggering setup due to their attachment directly to the drum itself.
Finally, I never gate drums to my recording path without the triggers in place. Alternatively, I can record the triggers’ audio each to discreet tracks and then leave the tom tracks un-gated. Then I setup the side-chain gating as a function of post production during mixing. The triggers’ audio can also be used for replacing drum sounds on your digital setups.
However with clamp on tom mics, I typically gate the toms on the return path of the tom’s track. I usually like the recording path un-gated. This is so I don’t miss any light drum hits that might not open the gates if they were in the record path. The gates are still an important tool, but I try not to commit them to recorded multitrack audio. Set ’em in post if possible!




One thought on “Secrets Of Audio Side-Chain Use”
Very good explanation of side chain
Thx for the knowledge