Why Cassette Tapes Won’t Play
Why listen to cassettes?
Let’s face it: audio cassettes are experiencing a comeback because people are rediscovering the appeal of physical, analog music formats in a world dominated by streaming. I know this firsthand because I restore hundreds of audio cassette tapes every year. Older listeners enjoy the nostalgia and family history preserved on tape, while younger generations often see cassettes as retro, collectible, and more personal than digital files.
Part of the attraction is the listening experience itself. Many people appreciate the analog sound character — including tape warmth, ultrasonic content, and even minor imperfections like hiss — which can feel more human and engaging than ultra-clean digital audio. Cassettes also encourage intentional listening. Unlike streaming, they slow the process down and make recordings feel like complete works rather than just endless background playlists.
But cassette tapes are also miniature mechanical devices, and like any mechanical format, problems can develop over time. Below are some of the most common reasons old cassette tapes become difficult — or impossible — to play.
Your pressure pad is missing
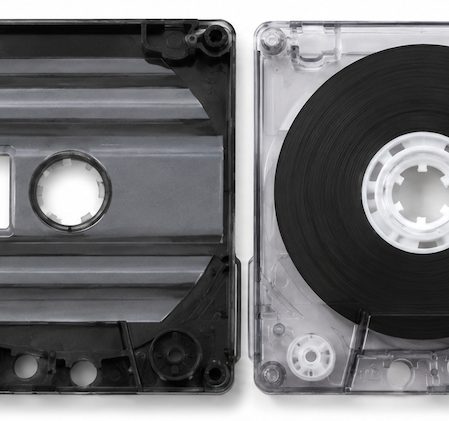
Take a peek into the tape opening of a cassette shell. You’ll see a gap where your cassette player’s magnetic tape head slides into the center of the tape when you press PLAY. Proper tape-to-head contact — often called tape wrap — depends on a small felt pressure pad built into the cassette shell.
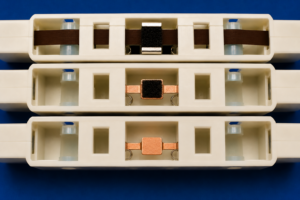
Over time, the adhesive holding that felt pad to its thin spring metal backing strip can dry out and fail. The pressure pad then falls off and disappears. If you’re lucky, you may find it loose inside the cassette case. Without that pad, the tape cannot maintain proper contact with the playback head, resulting in dull, lifeless sound with very poor high-frequency response.
If you’re handy, you can sometimes repair the cassette yourself. Fully rewind the tape first so only the clear plastic leader tape is exposed. Then carefully open a small tape loop and use tweezers and a toothpick to apply a tiny amount of adhesive while reattaching the felt pad. Avoid getting glue anywhere near the magnetic tape itself.
Some older pressure pads also harden with age. Hardened pads no longer provide proper tape wrap and should be replaced entirely. Replacement self-adhesive cassette pressure pads are still available from specialty suppliers like this.
Why Cassette Tapes Won’t Play
Your tape broke
Tape breaks inside a cassette shell can be frustrating and sometimes disastrous. The most common failure occurs where the original mastic splicing tape lets go at the junction between the clear plastic leader tape and the magnetic tape itself. Suddenly, the right-hand cassette spindle spins freely while the left spindle dumps precious tape into the cassette player. The loose tape is often being eaten by the capstan and pinch roller assembly.
So first: STOP the madness!
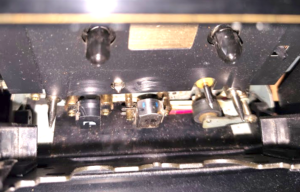
Immediately stop the machine, gently remove the cassette, and carefully untangle any exposed tape before additional damage occurs. Never continue running a cassette player once a tape begins squealing, slowing down, or spilling tape.
Other breaks can happen right in the middle of the tape itself. In many cases, these failures can actually be traced back to the cassette player rather than the tape. Older cassette decks often suffer from dried-out rubber belts, hardened pinch rollers, or failed take-up mechanisms. When the take-up spindle stops turning properly, the machine continues feeding tape into the transport with nowhere for it to go — almost guaranteeing a tape spill.
Again, stop the machine immediately and gently remove the cassette. I recommend placing the damaged cassette and any loose tape into a Ziplock bag until proper repairs can be attempted. This helps prevent further tangling and damage during handling or shipping.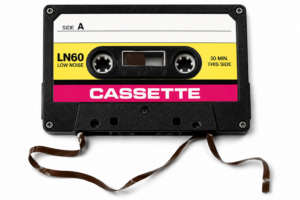
Repairing broken cassette tapes requires proper tools, supplies, skill, and patience. Typical repairs involve quality 1/8-inch splicing tape, a cassette-sized tape splicing block, razor blades, and a steady hand.
Cassette shells assembled with screws are usually much easier to repair than glued shells. Attempting to pry open glued cassette shells can easily crack or shatter the plastic housing. Worse yet, thin cassette tape loves to unspool itself once the shell is opened, often creating even more problems during amateur repair attempts.
Why Cassette Tapes Won’t Play
Your tape is jammed
A faulty cassette player with worn or broken belts can easily cause cassettes to jam. This is especially common with longer-format tapes such as C-90 and C-120 cassettes.
These extended-length cassettes use much thinner tape in order to fit more recording time into a standard cassette shell. A typical C-120 cassette uses extremely thin 9-micron tape — roughly half the thickness of shorter C-60 or C-30 tapes. This delicate tape loves to twist, tangle, and jam inside the shell.
Sometimes you can actually see the jammed tape through the cassette’s clear plastic window. Other times the jam is hidden, and the cassette simply refuses to advance or rewind properly. In many cases, diagnosing the problem requires opening the cassette shell to inspect the tape pack and internal rollers.
It’s generally best to store cassettes fully wound to one side. That way, the plastic leader tape helps protect the recorded magnetic tape inside the shell.
With reel-to-reel tapes, I usually play tapes to the end before storage and avoid storing reels immediately after fast winding. Cassettes are slightly more forgiving because the shell protects the tape pack, but storing cassettes after normal playback still promotes a smoother, more even tape pack that can help reduce jamming problems later.
Tape manufacturers once recommended gently rapping a cassette flat against a hard tabletop a few times on each side. This can sometimes help settle and even out the tape pack so the tape moves more freely inside the shell.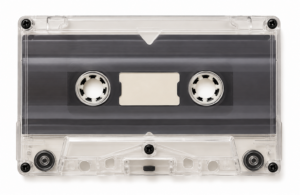
High-quality screw-assembled cassettes are usually less prone to jamming and often sound better thanks to improved tape formulations, smoother internal rollers, and better shell construction. But even the best cassette shells can struggle with ultra-thin C-120 tape.
Why Cassette Tapes Won’t Play
Your tape is inverted inside the shell
Once cassette tape becomes jammed or badly wrinkled, it’s surprisingly easy for the tape to fold over on itself inside the shell. When this happens, the cassette may begin playing the back-coated side of the tape rather than the magnetic oxide side where the audio was originally recorded. The result is greatly reduced audio level along with strange backwards-sounding playback. With the now tape inverted, you’re faintly hearing the tape’s opposite side but backwards.
Backward audio may have been all the rage during the psychedelic era of Strawberry Fields Forever in 1967, but it’s probably not what you were hoping to hear on your important family or original music recordings today!
Your cassette shell is damaged
In my restoration work, I’ve seen cassette shells that were cracked, smashed, melted, and even buried in mud for 50 years.
To successfully restore tapes with severely damaged shells, I often have to carefully transplant the original tape hubs and reels into a new donor cassette shell. This process can involve extremely delicate cleaning and handling procedures.
Once the original tape is installed into a replacement shell with new pressure pads, slip sheets, and internal rollers, I can usually perform a successful restoration transfer.
Why Cassette Tapes Won’t Play
Your cassette is a cheap Kmart special
Cheap cassette tapes were everywhere during the heyday of the cassette format. In my restoration work, I routinely encounter some of the worst examples of low-cost cassette manufacturing imaginable.
Ironically, many priceless family recordings were made on the cheapest tapes available at the local discount store. Unfortunately, these so called bargain cassettes were often the first to break, jam, invert, wrinkle, or simply fall apart with age.
Low-quality cassettes were usually assembled with glued shells rather than screws and often used fixed plastic tape guides that do not rotate. Instead of gliding smoothly across small rollers, the delicate tape simply scrapes across stationary plastic posts inside the shell. Over time, this creates friction, drag, oxide shedding, and increased tape wear.
Many of these low-cost cassettes now require extremely careful handling and specialized repair techniques in order to achieve a successful audio restoration transfer.
Why Cassette Tapes Won’t Play
Your cassette has Hydrolysis
Hydrolysis is a chemical breakdown of the binder — think of it as the “glue” that holds magnetic oxide particles onto the tape base.
Over time, some tape formulations absorb moisture from the air, which can damage the binder and make the tape unstable. Affected tapes make a squealing noise during playback, shed oxide, drag heavily and can damage recorded audio during attempted use.
This problem is far more common with certain professional reel-to-reel studio master tapes, especially high-bias back-coated formulations, but I have occasionally encountered cassettes suffering from similar symptoms as well.
Tapes affected by hydrolysis often require controlled “tape baking” in a specialized laboratory incubator oven. The gentle heating process temporarily stabilizes the tape long enough to allow safe playback and audio restoration transfer.
Please note that after a period of days or weeks, the tape will usually revert back to its unstable condition. That means the restoration transfer needs to be completed during this limited playback window while the tape remains stable enough to safely run.
In Conclusion
These are some of the most common cassette problems I have encountered during my many years of professional audio restoration work. Other issues — including tape azimuth errors, excessive room ambience, background noise, and recording defects — can also affect cassette recordings and playback quality.
It’s also important to understand that most cassette repairs are performed simply to allow safe playback and audio restoration transfer. Even after repair, damaged cassettes usually remain fragile and are generally not intended for repeated everyday playback.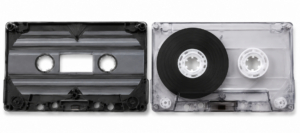
If I can assist your restoring your important audio, please see my Audio Restoration Services Shop for complete information about my services. You can also request a Free Quote for your project.
Please note: We’re sorry but we don’t restore commercially released and copywritten recordings. Instead, we restore our clients’ unique family, personal, and professional audio recordings for their own use. We restore many professional recordings, but these are for artists and producers who own the copyright for their material.
Mike Konopka